In the name of God, the Most Gracious, the Most Merciful, as we told you previously our primary goal for creating a Dev To Give website is to spread knowledge and provide explanations and ideas for web development to our valued followers.

|
| XAMPP server installation |
This article is an introduction to the world of web programming, in which we will start by learning web development from the ground up until you reach a stage where you can create your own site.
What if you want to see the results of programming with PHP, Perl, or MySQL? Will you have to raise your flag to the actual server? What about errors that may be present? Will you leave it to visitors? Of course not, because you will depend on a local server.
So, as we all know that if you want to start learning web programming, you have to download a local server program on your computer, and I, like most programmers in the world, prefer the famous XAMPP program, which recognizes its use because of its great advantages in dealing with software files and databases.
What is XAMPP?
It is free, open-source software developed almost over ten years ago by the Apache Friends team and is intended primarily for web developers who use PHP or Perl and similar programming languages, and for website and blog owners who deal almost daily with their site's code to Solve any existing problems or add some new developments or additions to the site.
The program enables the user to create his own local server on the computer he owns, which enables him to preview the results of the code he wrote without uploading it to an actual server if he is a programmer or a developer of web applications.
If the user is one of the site owners, he will be able to verify the work of new developments or additions applied to the site before they are actually applied to the site. If these modifications are incorrect and contain any kind of errors, these errors will appear to visitors to the site or blog, which is Not at all desirable.
But in our case, we will use this server to do our programming work and learn it by running the codes that we will create on it and make sure it works.
XAMPP Server Features
I will mention the most important features and features of the XAMPP server in detail below.
Free and open source
This program was and still is free since the launch of its initial version of it, and because of this, the program has received the approval of many and has established a large community of users and developers of its own, and it has received the necessary updates first hand, which made it an ideal choice for many.
Supported Software and Services
XAMPP supports many programs and services embedded in the program, including the name of the program as follows:
- X: Supports multiple platforms
- A: Supports Apache HTTP Server
- M: Supports MariaDB (previously MySQL) rules
- P: Supports the programming language PHP
- P: Supports the Perl. programming language
Because of its many services, it can run some popular applications such as WordPress and Drupal.
Multi-platform
The program offers multiple copies to serve all people regardless of their operating system. It supports (Windows - Linux - macOS) systems and provides official support for all of these systems.
Easy to install and use
The program comes with all its contents in one installation package, which makes it easy for the user to install and set it up automatically without the need to do any manual setup process. It also comes with a simple and uncomplicated user interface that provides the user with an easy user experience.
How to install and Setup XAMPP on Windows
At first, you have to go to the official website of the program to download the version of the operating system installed on your device from this link XAMPP Apache + MariaDB + PHP + Perl.

|
| Download XAMPP for Windows |
Note: The following explanation steps apply to Windows, so you may notice some minor differences during the installation process if you are installing on macOS or Linux.
Installing XAMPP
Now that you have finished downloading the program, let's start explaining the installation steps:
- Run the installation file downloaded from the official website and accept the required permissions.
- A message may appear that the antivirus is running on your device, and this may cause the installation process to be slow or affect it, and the user will ask: Do you want to continue? We choose Yes.

|
| XAMPP and antivirus |
- Then a warning message may appear to warn the user against installing the XAMPP server in the path C:\Program Files because this folder lacks some permissions necessary for the program to work properly, we choose OK.

|
| XAMPP installing path |
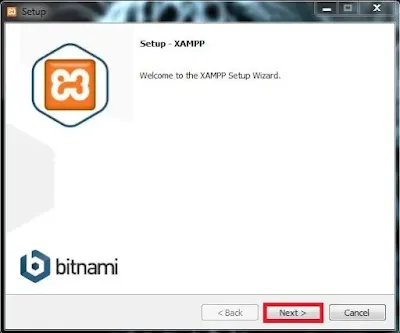
- Then from the main installation interface, click Next.
|
| XAMPP installation interface |
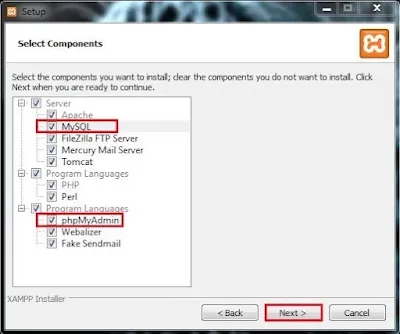
- In the following interface, the services and programming languages to be installed are selected. It is better to keep the default options All selected. It is very important to make sure that MySQL and phpMyAdmin are selected to ensure that WordPress will run locally in the future, and then we press the Next button.
|
| XAMPP services selection |
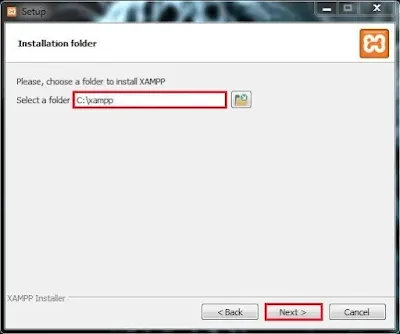
- From the following interface, the place to install the program is determined on the device. It is better to install the program in the default path C:\xampp to ensure the program works and avoids any problems, then press the Next button.
|
| Locate install XAMPP |
- Then choose program language from the drop-down list and click Next.

|
| XAMPP language |
- An interface will appear that is not related to the installation process, but rather a message from the developer company to learn more about its available applications, the user is left to choose the appropriate option and then press Next.

|
| Xampp plugins |
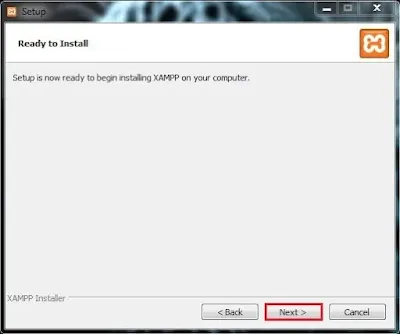
- And here the interface that tells us that the installation is ready appears, we press the Next button.
|
| Installation is ready XAMPP |
- The installation process will start and may take some time, just wait for it to finish.

|
| XAMPP installation |
- Note: During the installation process, a security alert message may appear from Windows regarding network access, it is recommended to keep the default options and then click on Allow access.

|
| XAMPP security alert |
- Finally, the interface for the completion of the installation appears, which contains an option to open the program’s control panel upon completion, we click on Finish.

|
| installation is done XAMPP |
- The main interface of the programs will appear as follows.

|
| XAMPP Interface |
Run XAMPP
Thus, the installation process was completed successfully, and to verify that the program works correctly, we do the following:
- We launch both Apache and MySQL by clicking on the Start button next to them.

|
| start using XAMPP |
- A security alert message may appear from Windows regarding network access, it is preferable to keep the default options and then click on Allow access because if access to the network is not allowed, the program will not work.
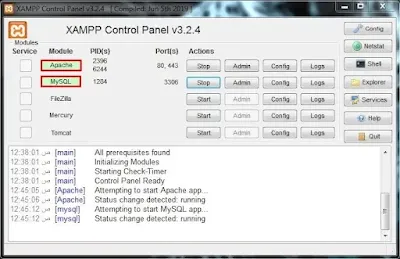
- After Apache and MySQL are running, the color surrounding the name should change to green to indicate that the component is working properly.
|
| XAMPP status |
- And as an additional step to make sure that everything works as it should, you can open the browser and enter the link http://localhost, and if a page like the following image appears, make sure that the program works without any problems.

|
| Test localhost XAMPP |
- After completion, Apache and MySQL can be stopped by pressing the Stop button, and then they will be back to normal.

|
| Stop XAMPP |
Important point
After the program is installed successfully, the user will use it for one of the reasons we mentioned above, and for that, he needs to know where he will put what he wants to test, and this place is inside the folder of the XAMPP program, which in turn is in the path we specified during the installation process. Steps with us the path will be C:\xampp.
Inside the XAMPP folder, we will find a folder called htdocs, which is the folder we are looking for, which will put everything the user wants to try inside.
